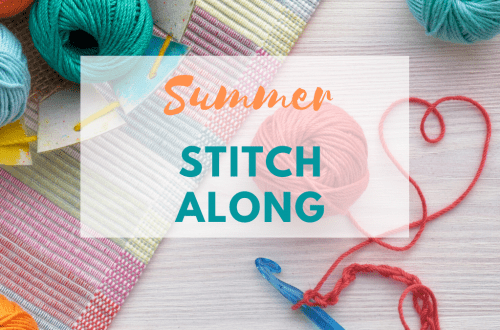
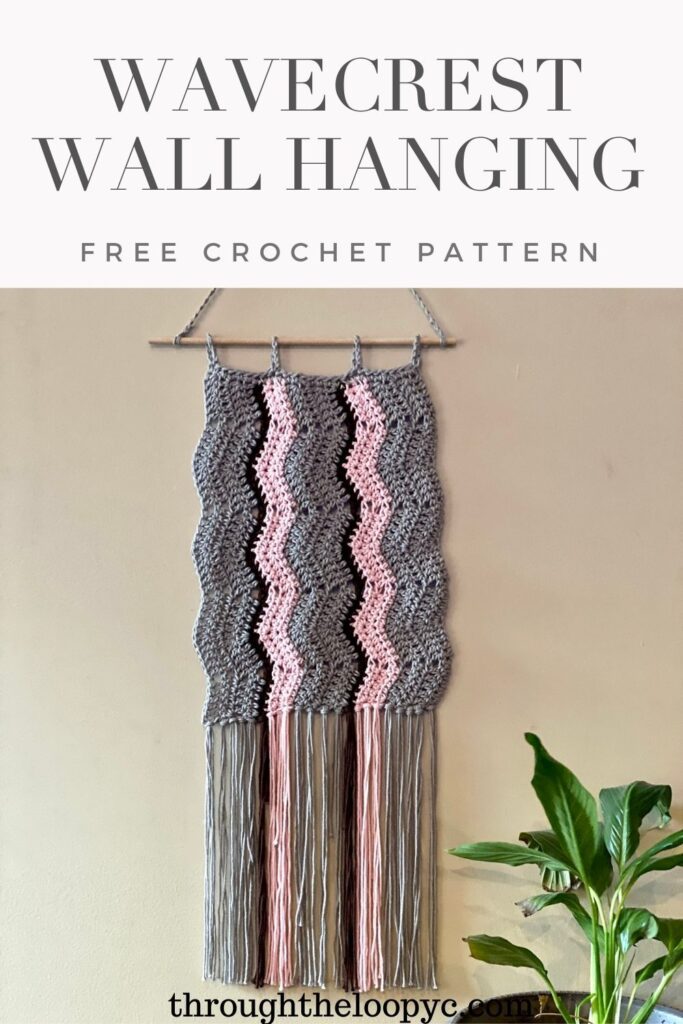
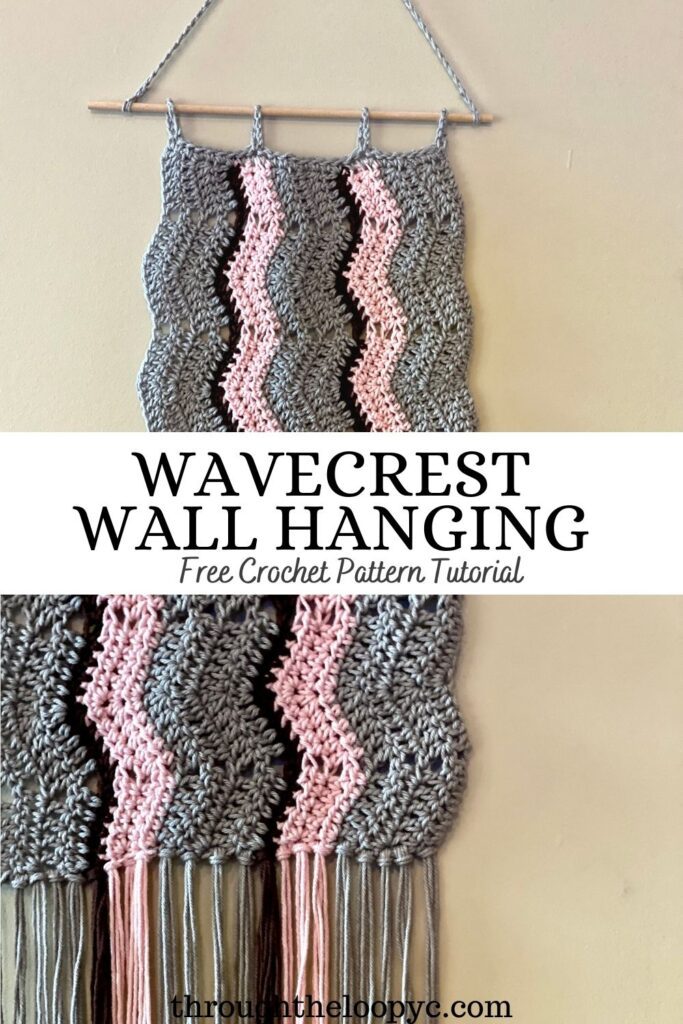
Wavecrest Wall Hanging
I have been wanting make a new wall hanging for our hallway for quite some time and finally made the time to create one! I loved it so much I thought it would be perfect to share with you. The Wavecrest Wall Hanging is quick to make and super easy to customize.
Save It To Your Favorites

Wavecrest Wall Hanging Ad-Free Premium PDF Printable
Get your copy of the premium ad-free PDF pattern. The Premium version includes photo tutorials!


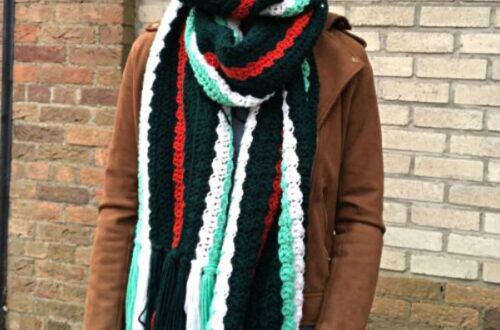
Crochet Room Decor
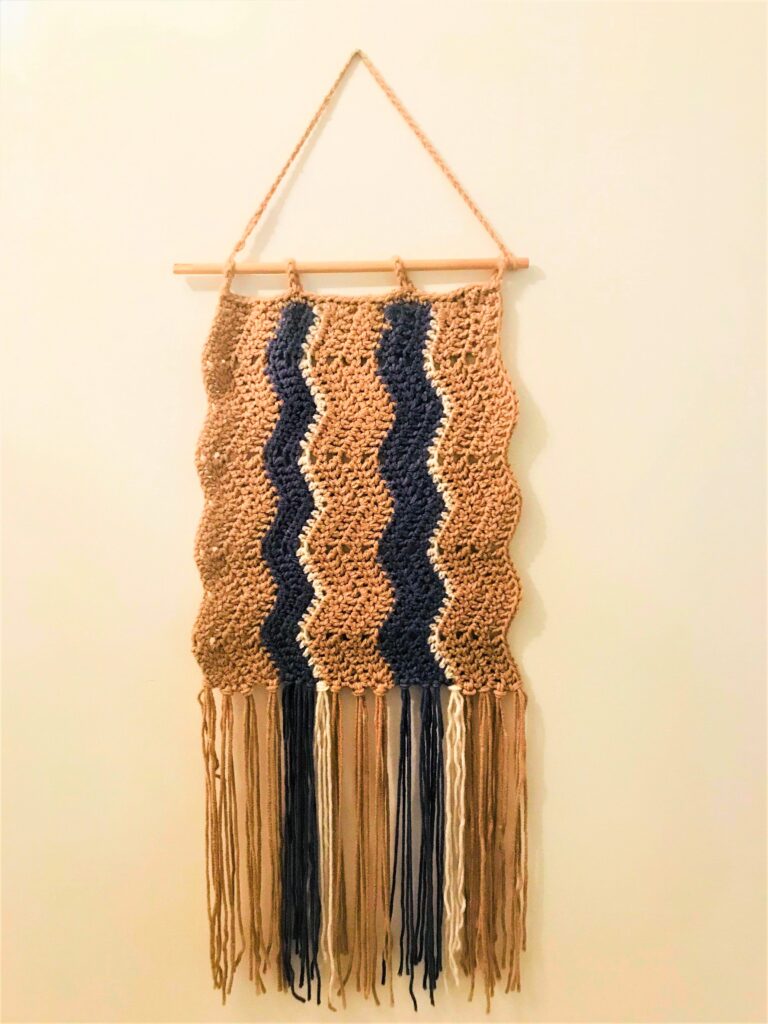
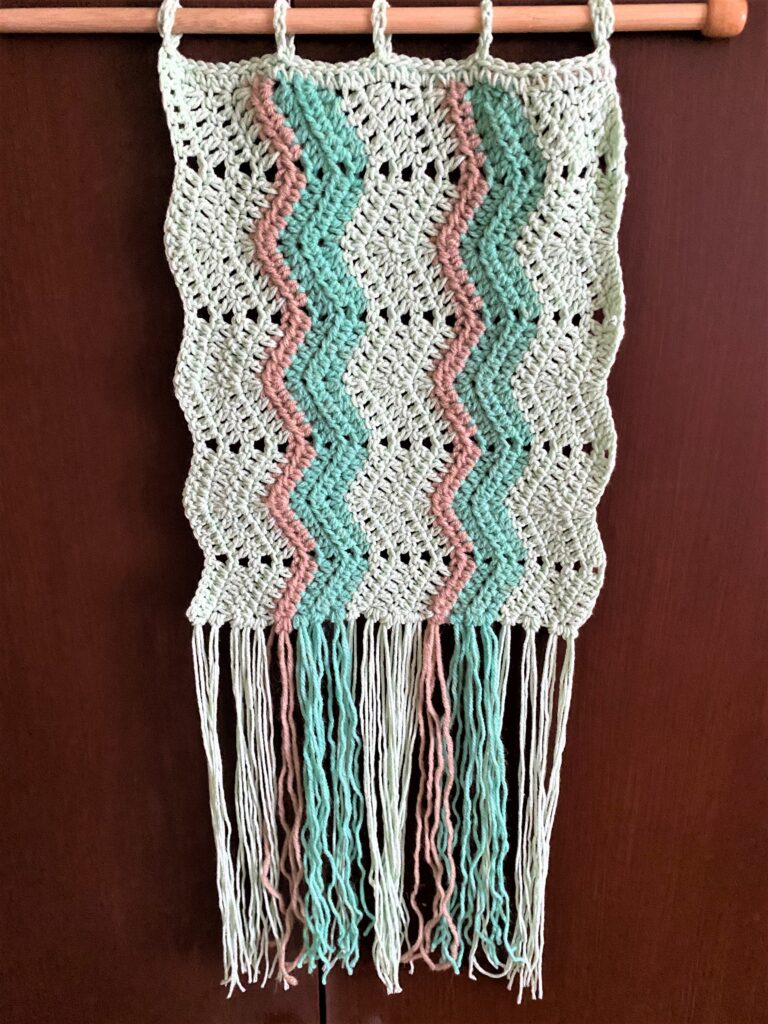
The wavecrest Wall Hanging is so easy to customize for any room by using the colours to match the decor. Wouldn’t it be so cute in a Nursery, or guest bathroom?
The pattern is made horizontally, but is hung vertically for a unique twist on the classic ripple design. The loops are easy to size so you can use any sized dowel or branch. Adjust the length of the fringe for the perfect length to fit your space as well!
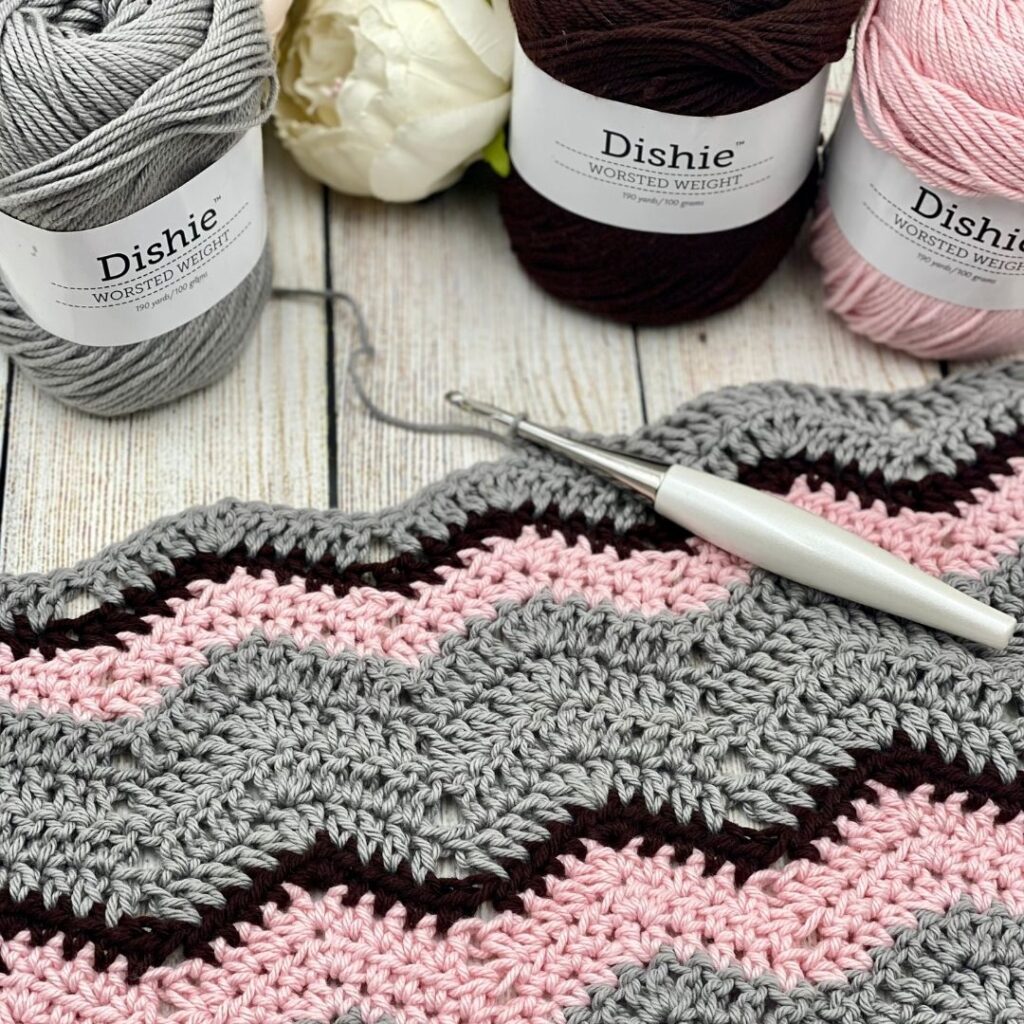
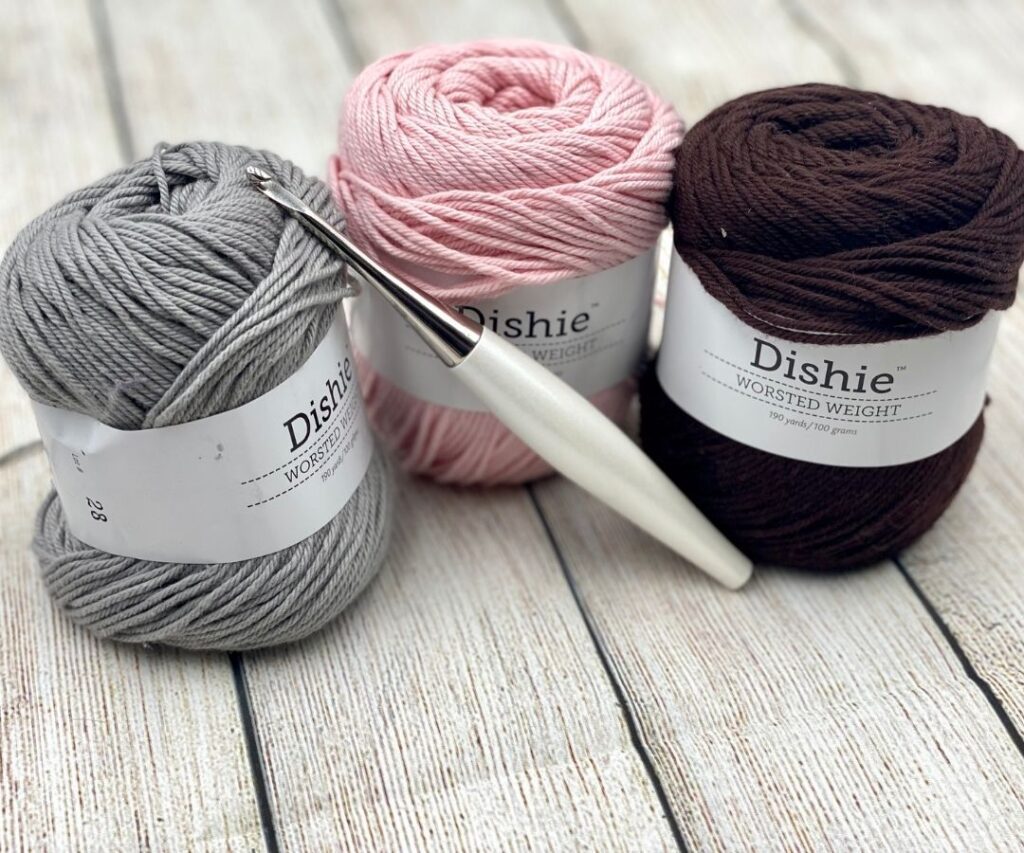
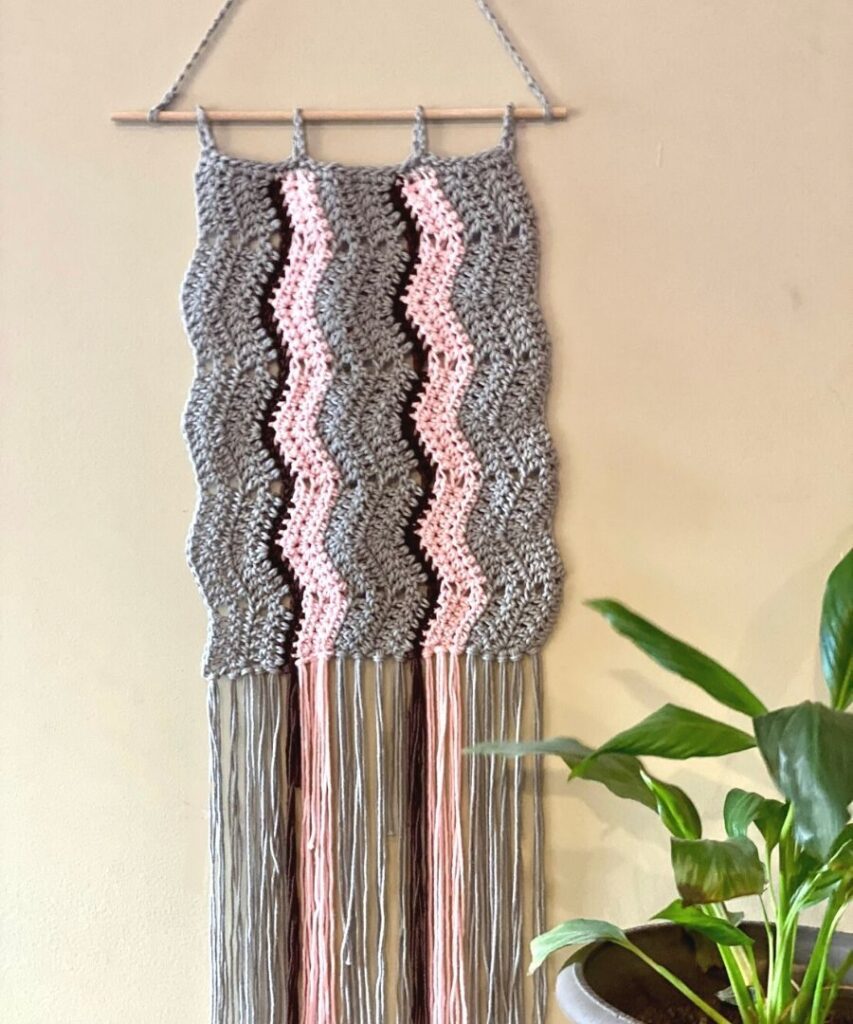
I chose to use *WeCrochet’s *Dishie yarn in Silver, Blush, and Coffee. The colours and stitch definition of Dishie works wonderfully for home decor items.
A special thank you to *WeCrochet for providing the yarn for this project.
Interested in more tips on decorating your home with Knitting and Crochet? Check out this informative article on Porch.com!
Video Tutorial

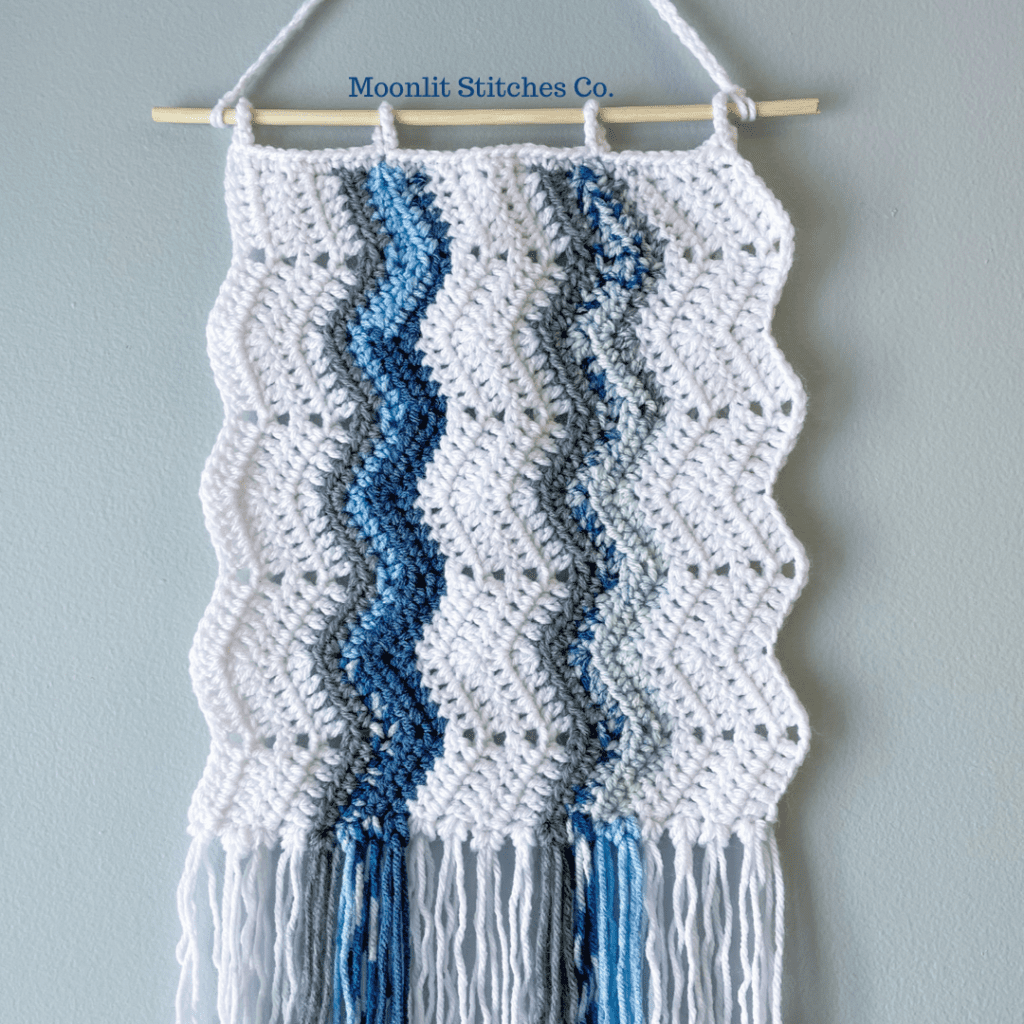
The Tester Pictures
My testers Wall Hangings turned out wonderfully!
Some of the yarns they used included: Alize Cotton, Impeccable, and Craftsmart Value.
Wavecrest Wall Hanging
Materials
- Approx. 142 yds of #4 worsted weight yarn. I used *Dishie Cotton in Silver, Blush, and Coffee
- US size H/8 – 5.0mm crochet hook. I used my *Furls Odyssey
- *Scissors
- *Yarn needle
- *Tape measure
- Wood Dowel or branch. I used these *dowels
Difficulty
Easy
Gauge
Not critical My measurements were: 4 rows dc 2″ Repeat st section: 3″
Size
Laid flat excluding fringe: 10″ wide x 13″ high Before blocking, not including fringe or hangers
Abbreviations
- sc – Single Crochet
- hdc – Half Double Crochet
- dc – Double Crochet
- ch(s) – Chain(s)
- st(s) – Stitch(es)
- sk – Skip
- slst – Slip Stitch
- C1 – Colour 1
- C2 – Colour 2
- C3 – Colour 3
Pattern Notes
- US Terminology
- All beginning turn chs do not count as a stitch
- Body of the wall hanging is worked in rows
- Fringe is optional
- You can adjust width by continuing the row repeat until desired size
- You can adjust height by by increasing the starting ch until desired size
- Once complete, I hung mine and steamed with a clothes steamer to get the fringe nice and straight.
- Pattern uses multiples of 11 + 3
- *-* denotes repeat sequence
Wavecrest Wall Hanging
The Pattern
Using C1, Ch47
Row 1: 2 dc in the third ch from the hook, dc in the next 4 chs, sk 2 chs, dc in the next 4 chs, *3 dc in the next ch, dc in the next 4 chs, sk 2 chs, dc in the next 4 chs* repeat across, 2 dc in the last ch, ch2, turn (45).
Row 2: 2 dc in the first st, dc in the next 4 sts, sk 2 sts, dc in the next 4 sts, *3 dc in the next st, dc in the next 4 sts, sk 2 sts, dc in the next 4 sts* repeat across, 2 dc in the last st, ch2, turn (45).
Row 3 – 4: Repeat row 2. At the end of row 4, ch1
Switch to C2
Row 5: 2 hdc in the first st, hdc in the next 4 sts, sk 2 sts, hdc in the next 4 sts, *3 hdc in the next st, hdc in the next 4 sts, sk 2 sts, hdc in the next 4 sts* repeat across, 2 hdc in the last st, ch1, turn (45).
Row 6 – 7: Repeat row 5.
Switch to C3
Row 8: 2 hdc in the first st, hdc in the next 4 sts, sk 2 sts, hdc in the next 4 sts, *3 hdc in the next st, hdc in the next 4 sts, sk 2 sts, hdc in the next 4 sts* repeat across, 2 hdc in the last st, ch2, turn (45).
Switch to C1
Row 9 – 12: Repeat row 2. At the end of row 12, ch1
Switch to C2
Row 13 – 15: Repeat row 5.
Switch to C3
Row 16: Repeat Row 8
Switch to C1
Row 17 – 20: Repeat row 2. Do not tie off after row 20
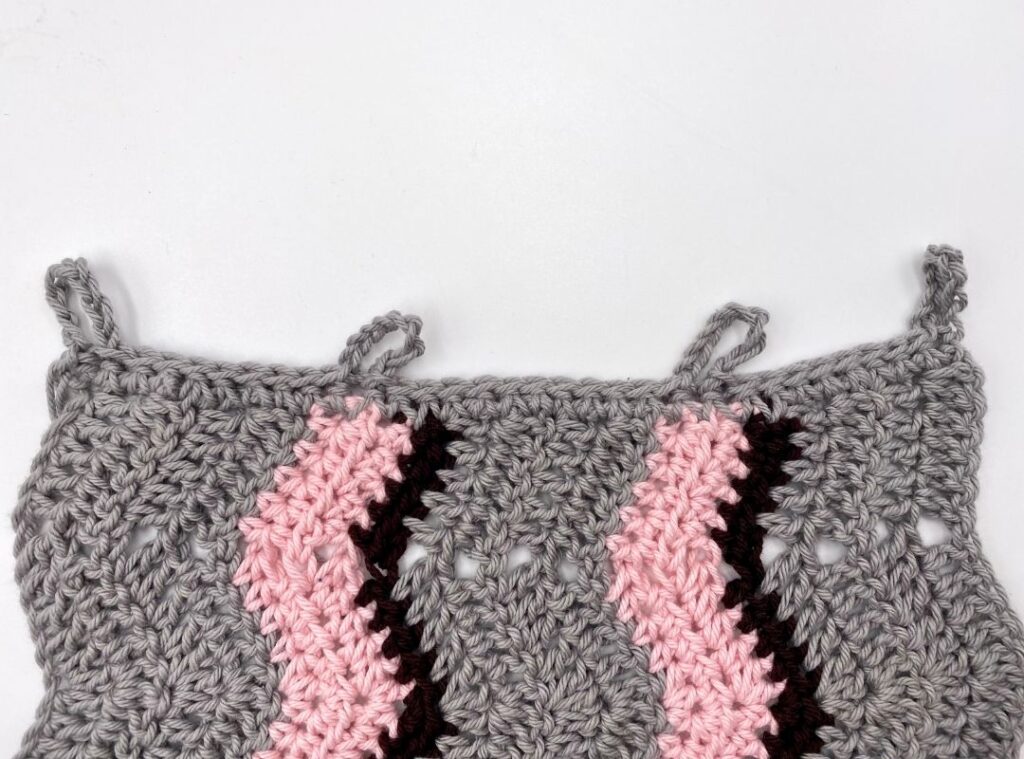
Making The Hanger Loops
Rotate your wall hanging so the chevrons are vertical. Weave in any ends from colour changes, on one side only, this is now the top of the wall hanging.
Starting from where you finished row 20, pick up the loop, and begin to sc evenly across the top. Approx. 1 st at the end of each row, you may want a few more along the dc sections).
Once you reach the end, turn your work.
Ch8, slst to the same stitch to create your first loop, continue to slst in each st across until you reach the center of the C2 section.
Ch8, slst to the same stitch to create your second loop, continue to slst in each st across until you reach the center of the next C2 section.
Ch8, slst to the same stitch to create your third loop, continue to slst in each st across until you reach the last st.
Ch8, slst to the same stitch to create your final loop, tie off.
Making The Hanging Chain
Make a loose slip knot, and guide it onto your dowel, insert your hook, and pull tight. With working yarn, chain 50, attach to the opposite end of the dowel by stitching around the dowel. Secure the ends, and weave them through the ch.
Attaching The Fringe
Cut your strands of yarn for the fringe in approx. 25″ lengths. I cut 30 in C1, 12 in C2, and 6 in C3. Do a few extra of each colour if you’d like to add a little extra bulk!
Using 2 strands at a time (3 for C3), fold in half, using your hook, guide strands through from back to front at the bottom of the first row.
Pull the loop through, pull the strand ends through the loop, pull to tighten and secure the fringe.
The end of each row will have fringe in the corresponding colour. You can add more for a thick fringe if you choose.
Special Note: When you reach a spot that has an unweaved end from the body of the hanging, pull that through the loop with the fringe ends, to secure as well!
Weave in all ends, and you’re done!
All Set!!!
There you have it! Your very own Wavecrest Wall Hanging!
Prefer printed copies better?! The ad-free printable premium PDF version with stitch tutorial is available on Etsy or Ravelry!
While you’re here why not take a look at my other patterns?!
If you’d like to stay In The Loop with all things Through The Loop Yarn Craft join the Newsletter for a special gift and updates of pattern releases and special offers!
I hope you love your Wavecrest Wall Hanging !! I would love to see how yours turn out!
Thanks for stopping by!
Please feel free to sell your handmade products created from this original Through The Loop Yarn Craft pattern. I ask that you please give credit to Ashley Edmonds from TTLYC as the designer, when possible, and link back to www.throughtheloopyc.com and/or @throughtheloopyarncraft (on social media) when selling and sharing images online.
©2022 Through The Loop Yarn Craft – Ashley Edmonds This pattern and its associated images are copyright protected. The pattern is for your personal use only. Please do not copy/paste, distribute, or alter and claim as your own.
*Indicates an affiliate link which means I may receive commissions if you choose to purchase through links I provide (at no extra cost to you). Thank you for supporting the work I put into this site!. Read my full disclosure here.


You May Also Like
Keighley Crochet Cowl Free Pattern
Super Scarf Crochet Pattern