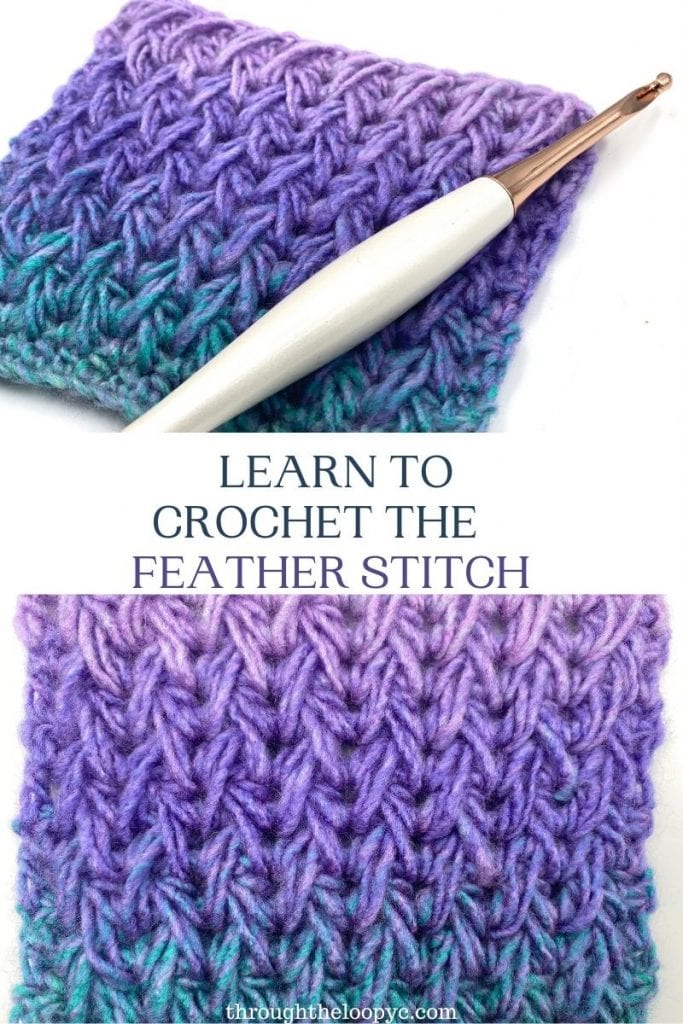
Feather Stitch Crochet Tutorial
A Step-By-Step Photo Crochet Stitch Tutorial
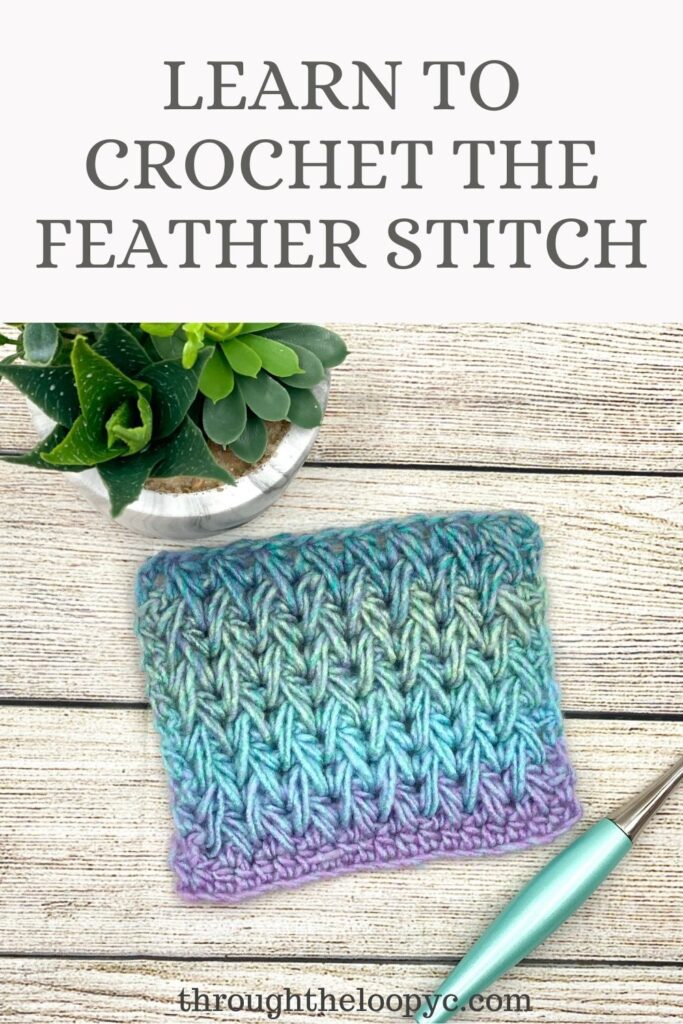
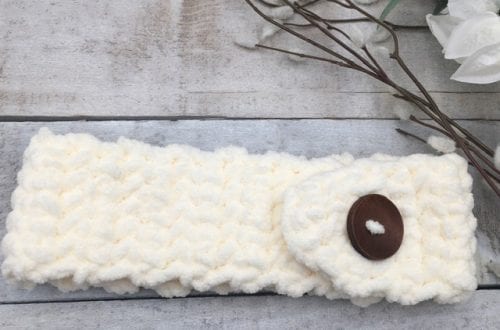
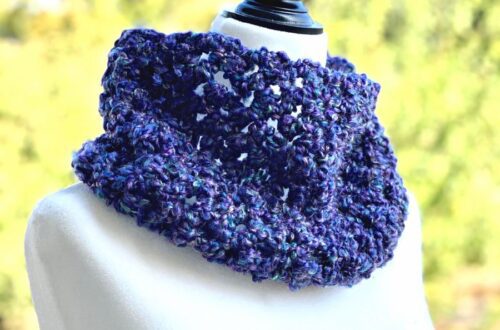
Today I bring you one of my ALL-TIME favourite crochet stitches the Feather Stitch. The Feather Stitch is a gorgeous and fun to make stitch. It may look complicated, but it’s easy to learn, and you’ll be glad you did.
Video Tutorial

Materials
The materials I used for the swatch are:
- *Bernat Super Value and *Lion Brand Ferris Wheel in Cotton Candy
- *Furls
- crochet hook
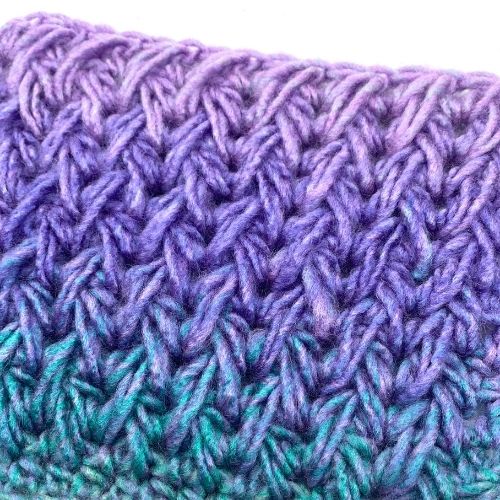
The Feather Stitch can be made with any yarn and looks stunning when used with ombres!
As this is quite a dense stitch, I do recommend using a #3 or #4 weight yarn. Bulky yarns will be quite bulky!
Feather Stitch Tutorial
The Feather Stitch is similar to a cluster or a mixed cluster stitch. It’s all about where you are inserting your hook. It gives gorgeous texture and a bit of bulk for warm winter items.
You will want to stick multiples of 2 for your starting chain.
Here are the steps written out with step-by-step with photos.
The Feather Stitch (FS)
Abbreviations
- FS- Feather Stitch
- hdc – Half Double Crochet
- ch – Chain
- sk – Skip
- st – Stitch
- chsp – Chain Space
- yo – Yarn Over
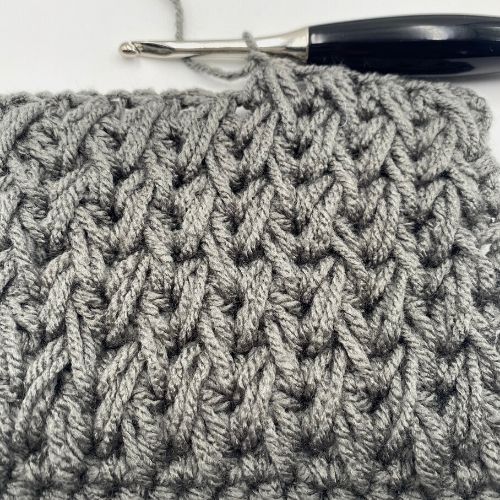
Steps For the Feather Stitch With Pictures
- Setting The Foundation: Begin with a chain in multiples of 2. Row 1: Hdc in the second ch from the hook, and each ch across, ch1, turn your work. Row 2: Hdc in the first ST, *ch1, sk next st, hdc in the next st*, repeat across, ch1 turn.
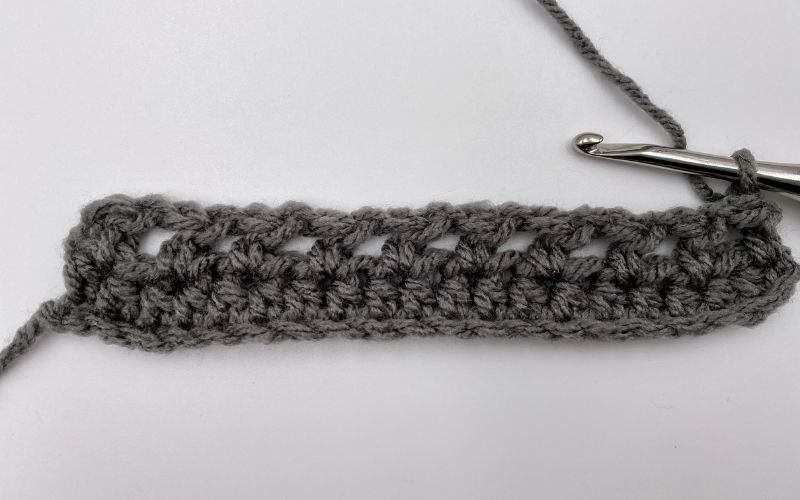
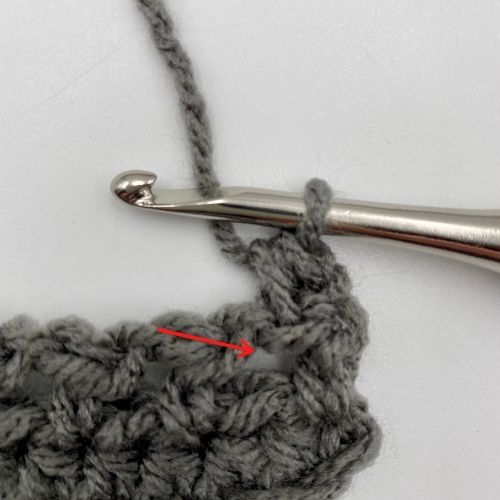
Feather Stitch Row 1
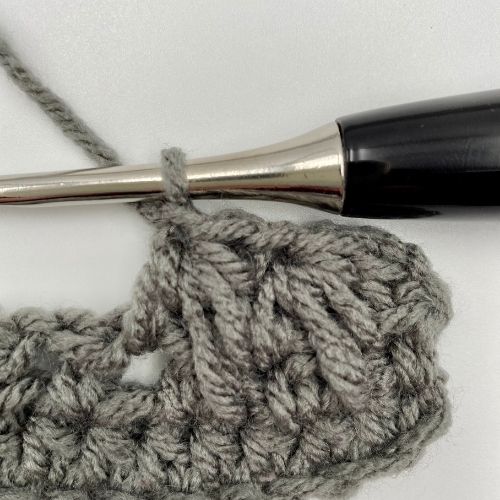
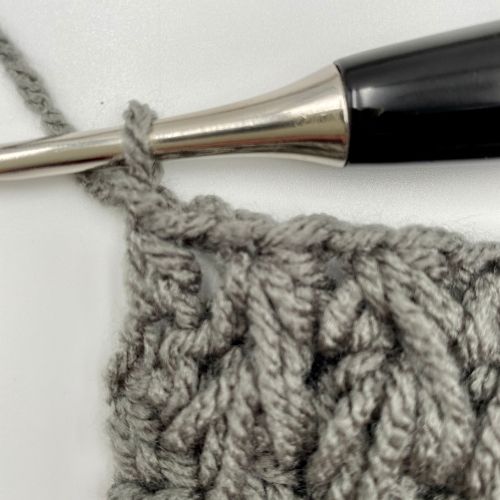
Hdc into the first st (same st as your ch1), ch1, yo, insert hook into the chsp, yo, pull up a loop.
Yo, insert hook into the space under the chsp. (3 loops on hook).
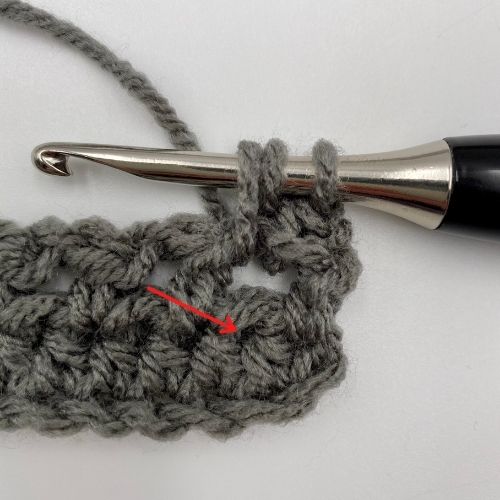
Yo, pull up a loop, (5 loops on hook). Insert hook into the next chsp.
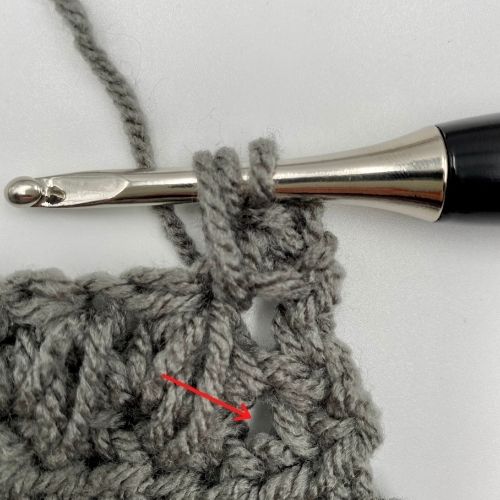
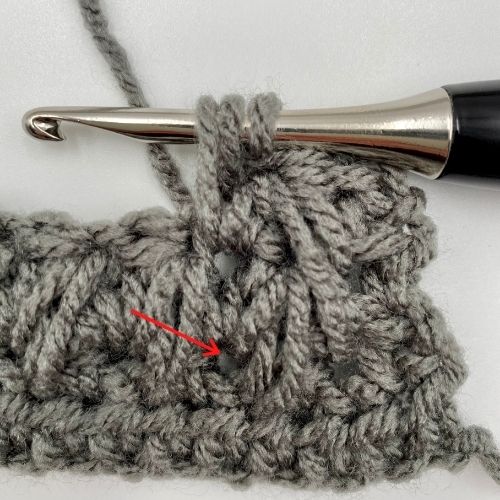
Yo, pull up a loop, (7 loops on hook), Yo, pull through all loops on hook, ch1.
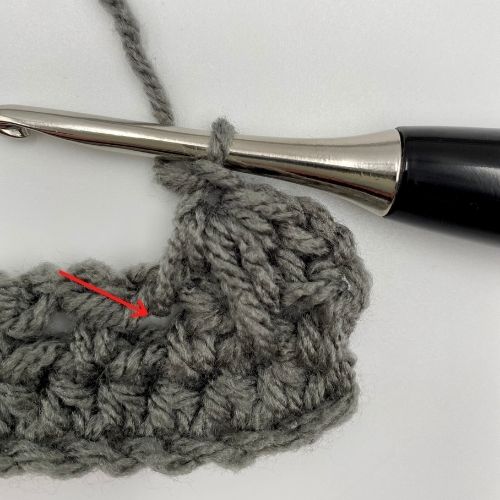
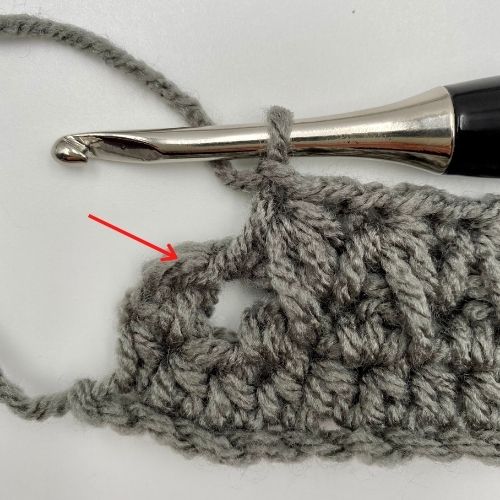
That completes the first Feather Stitch of the row! To begin next Feather Stitch, insert your hook into the same chsp, that the first FS finished in. (See red arrow above).
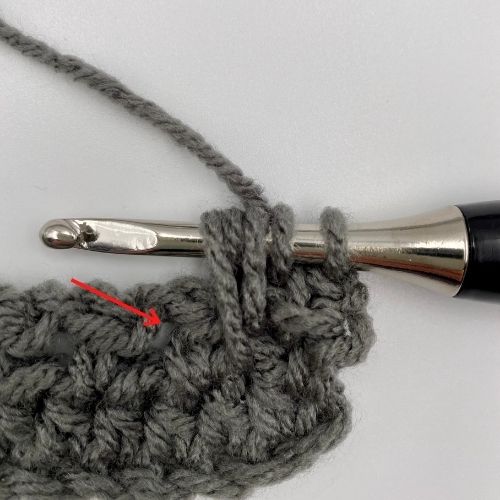
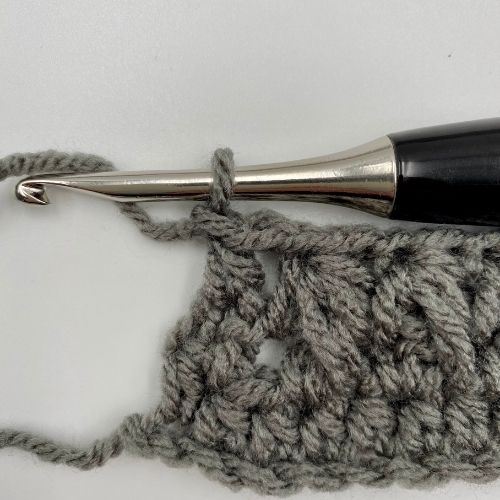
Yo, insert hook into chsp indicated above, yo, pull up a loop. (3 loops on hook), yo, insert hook into space below the chsp.
Yo, pull up a loop. Insert hook into the next chsp. (5 loops on hook).
Yo, pull up a loop, (7 loops on hook), yo, pull through all loops on hook, ch1.
That completes your second Feather Stitch of the row!!
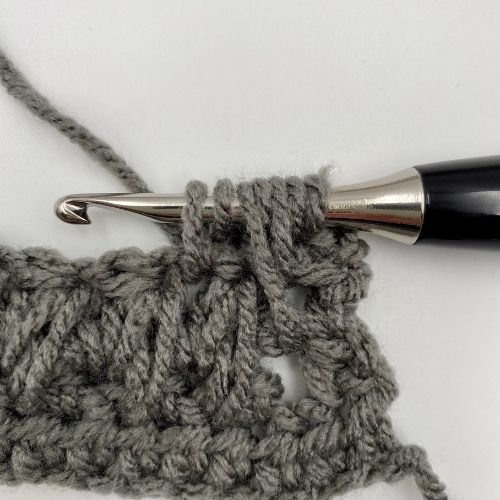
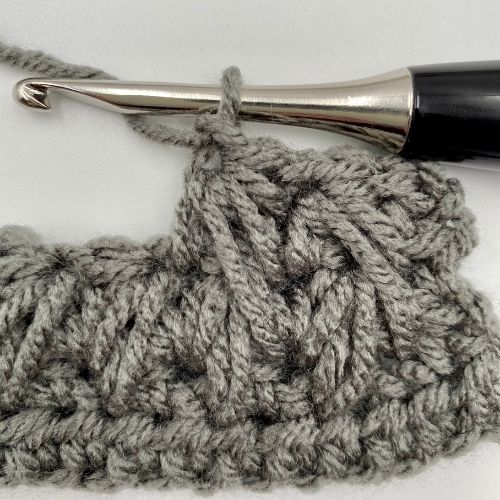
Repeat across until you get to the last chsp.
Once you’ve completed the FS across and used the last chsp, locate the last st of the row.
Hsc in the last st, ch1, and turn.
Feather Stitch Row 2 (and repeat rows).
Hdc into the first st (same st as your ch1), ch1, yo, insert hook into the chsp, yo, pull up a loop. (3 loops on hook).
Yo, insert hook into the space under the chsp.
Yo, pull up a loop, (5 loops on hook), yo insert hook into next chsp.
Yo, pull up a loop, (7 loops on hook).
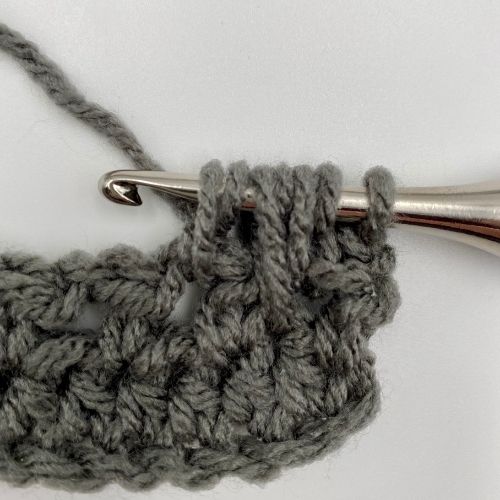
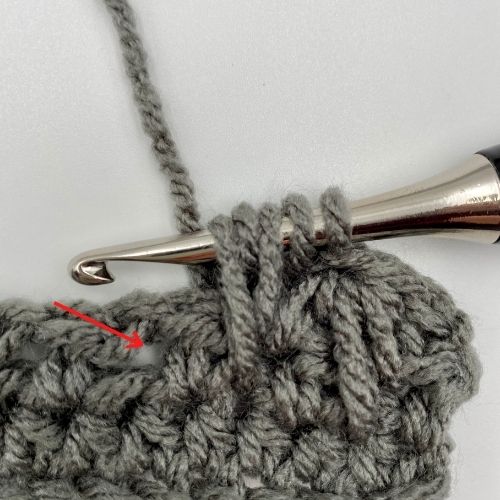
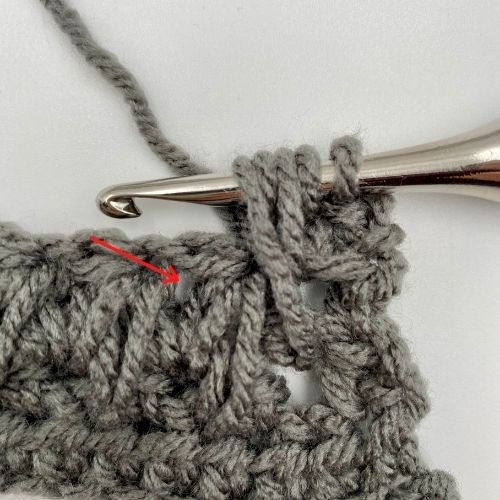
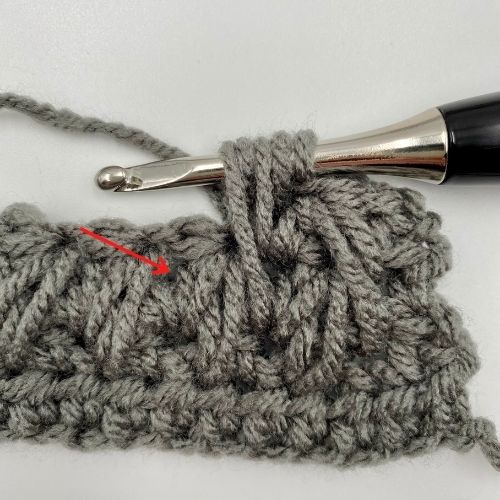
Yo, pull through all 7 loops, ch1. To begin next FS insert hook into the same chsp as the first FS was completed. (See red arrow).
Yo, insert hook into chsp, yo, pull up a loop, yo, insert hook into space below chsp.
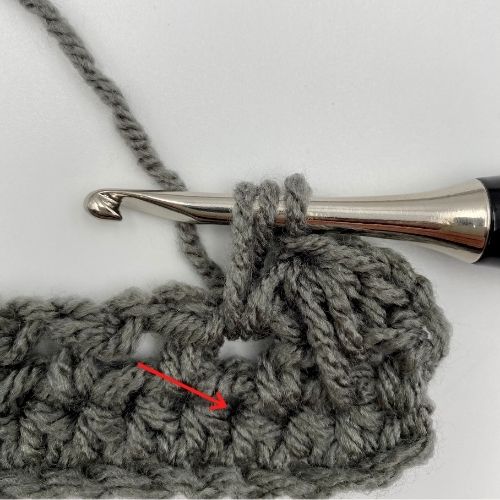
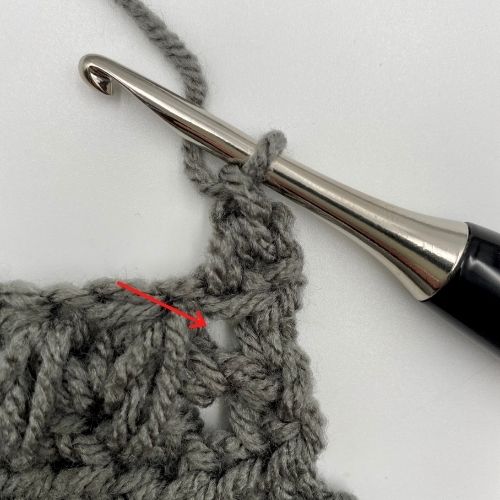
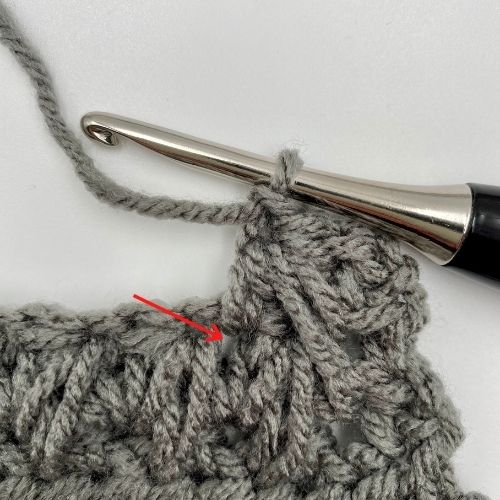
Yo, pull up a loop, yo, insert hook into space between FS’s (see red arrow).
Yo, pull up a loop, yo, pull through all 7 loops on hook, ch1 to complete FS. Repeat across until you get to the last chsp.
Once you’ve completed the last FS of the row, locate the last st (the hdc of the start of the previous row).
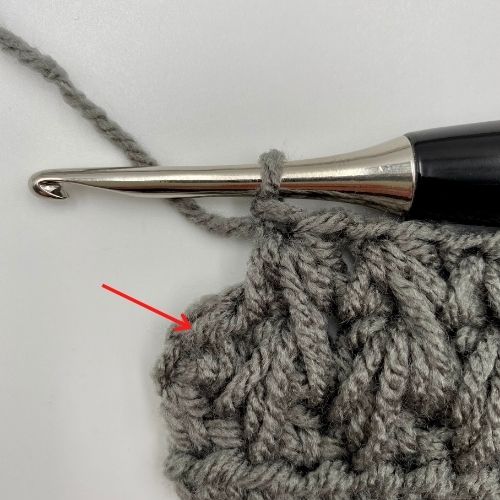
Hdc in the last st to complete the row. ch1, turn to begin the next row. Repeat the steps above!
That’s all there is to it! Once you’ve got the hang of it you will by flying through it! (See what I did there! 😉
Ready, Set, Crochet!
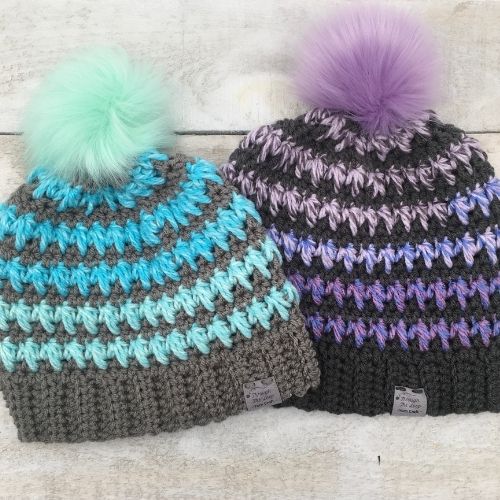
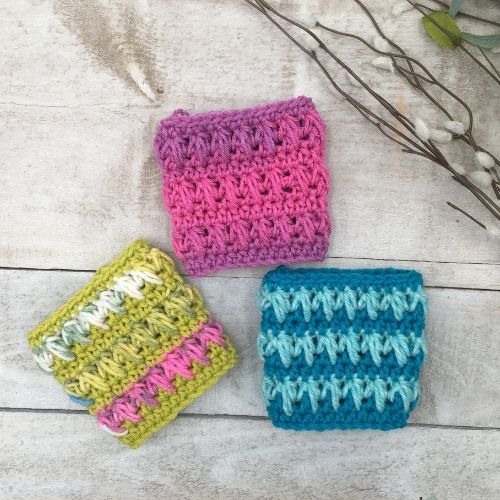
Ready to try the it out in a pattern?!
Check out the Wilhelmina Beanie and the Wilhelmina Cup Cozy patterns!
Thank you so much for stopping by! I hope this information has been helpful for you! Think it might help out another maker?! Please share and spread the love!
If you’d like to stay In The Loop with all things Through The Loop Yarn Craft join the Newsletter for a special gift and updates of pattern releases, tutorials and special offers!
While you’re here why not take a look at my other patterns?!
Thanks for stopping by!
Please feel free to sell your handmade products created from this original Through The Loop Yarn Craft pattern. I ask that you please give credit to Ashley Edmonds from TTLYC as the designer, when possible, and link back to www.throughtheloopyc.com and/or @throughtheloopyarncraft (on social media) when selling and sharing images online.
©2022 Through The Loop Yarn Craft – Ashley Edmonds This pattern and its associated images are copyright protected. The pattern is for your personal use only. Please do not copy/paste, distribute, or alter and claim as your own.
*Indicates an affiliate link which means I may receive commissions if you choose to purchase through links I provide (at no extra cost to you). Thank you for supporting the work I put into this site!. Read my full disclosure here.


6 Comments
Stacey Kennedy
I love your pattern thank you for sharing. What yarn did you use for the purple color changing yarn? It’s gorgeous
Ashley
I’m so glad you like it! The colourful purple yarn is Lion Brand Ferris Wheel in Cotton Candy 🙂
Cat
Hi, love your photo tutorial, what size hook have you used? I’ve got some aran weight yarn I want to do this stitch with, so just trying to work out the best hook size. Thank you!
Ashley
Hello,
I used a 5.0mm, but any hook size recommended for your yarn should do the trick!
Sabine
Hello
Is this stitch using a lot of thread?
Ashley
Hello, it is a bit of a yarn eater, yes.