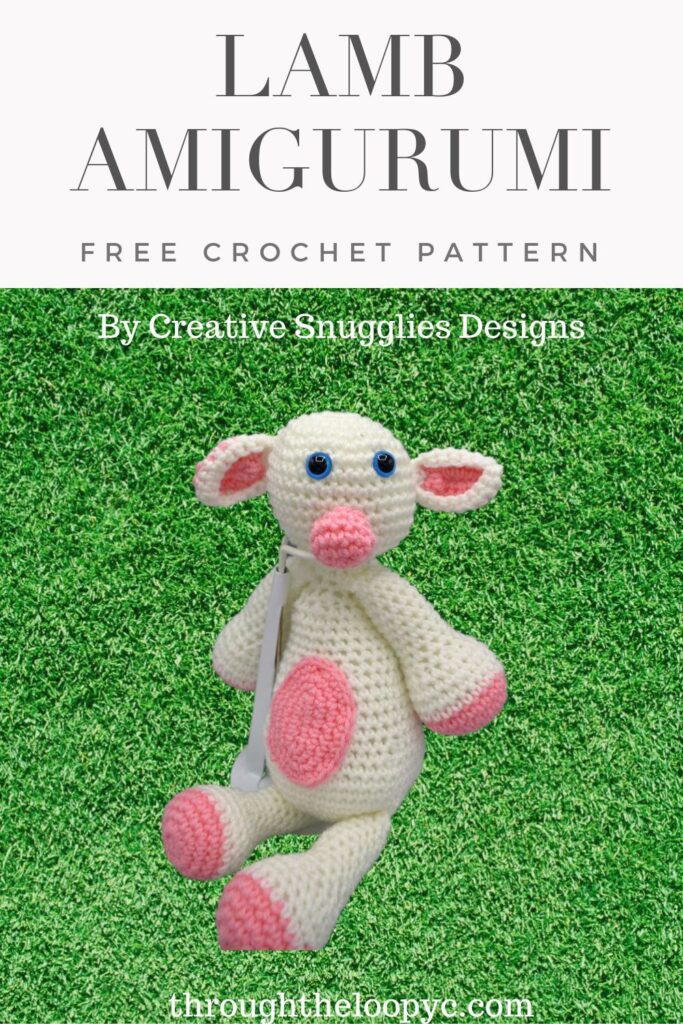
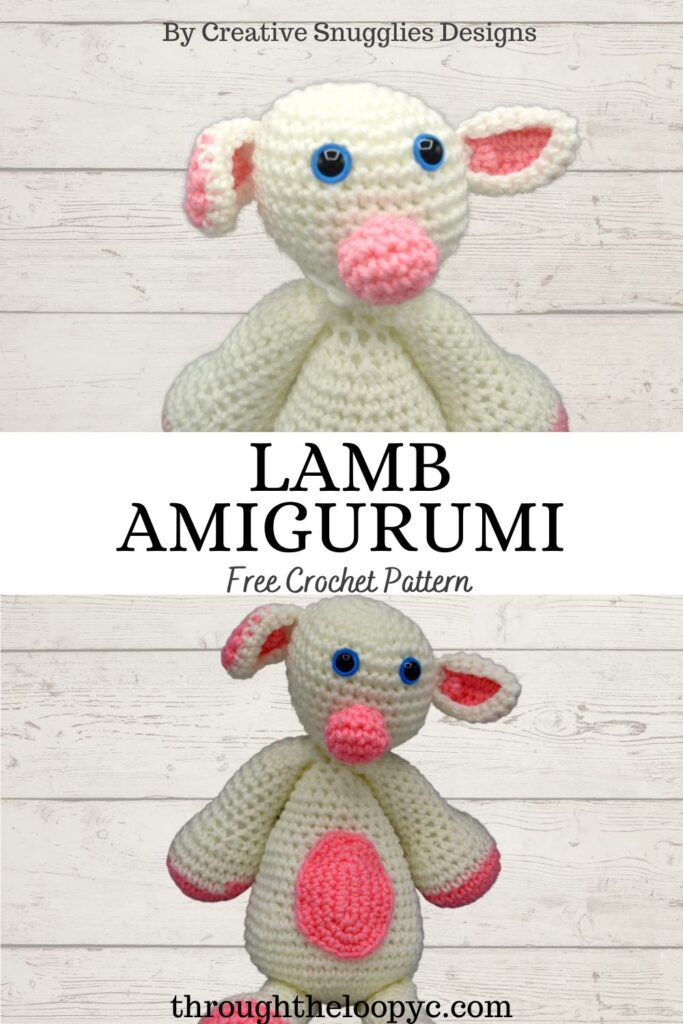
Lamb Amigurumi – Free Pattern
Welcome to the very first pattern in the new Guest Designer Series! I am so excited to share with you a pattern by other designers so you can get a feel for their style and designs too! The Guest Designer Series will allow other crochet designers to host their design on the TTLYC blog so you all can get acquainted! I’ am very pleased to introduce you to Christina from Creative Snugglies Designs with the adorable Lamb Amigurumi Pattern.
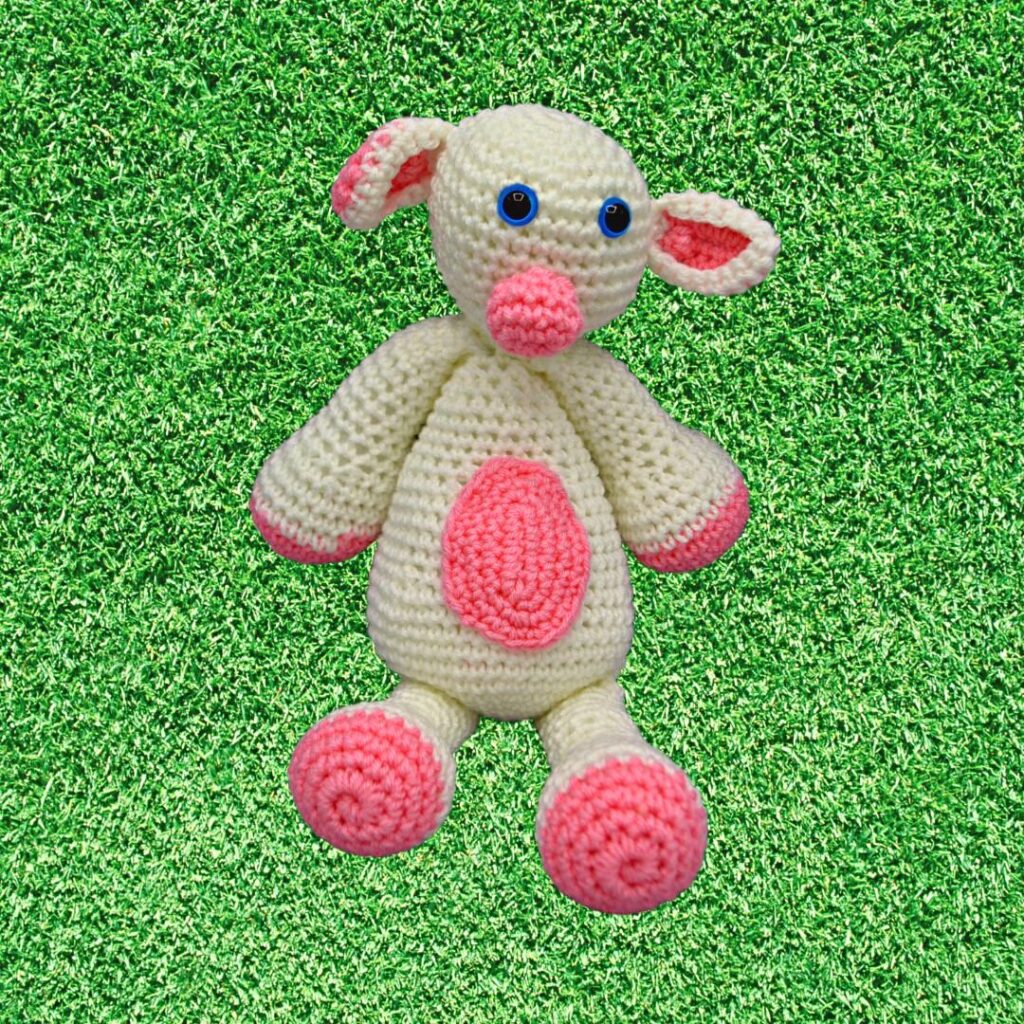
This adorable lamb is the fourth animal design in Creative Snugglies farm animal collection that is being released this year. This lamb is so cuddly and soft that your child will enjoy snuggling up with this sweet stuffy.
Meet The Designer
Hi, my name is Christina Ryan. I am the owner and designer of Creative Snugglies Designs. I am also the owner and writer for Creative Snugglies, homeschooling, and faith blogs. I have been married to my husband David for 23 years and we have two beautiful daughters, Gigi (22) and Bella (9).
I have been crocheting for over 10 years, and have been designing for 2 years. At Creative Snugglies, we want to help you grow in your crochet skills with free and paid crochet patterns, free crochet-alongs, and crochet tips.
Stay In Touch With Creative Snugglies Designs!
Facebook Page https://www.facebook.com/Creative-Snugglies-Designs-104530804870447
Facebook Group https://www.facebook.com/groups/440457534004813
Instagram https://www.instagram.com/creativesnugglies/
Pinterest https://www.pinterest.com/creativesnugglies
Email Sign up https://landing.mailerlite.com/webforms/landing/p7p9z4
Blog: Creative Snugglies – Crochet, Faith, and Homeschooling
Lamb Amigurumi Ad-Free Premium PDF Printable
Get your copy of the premium ad-free PDF pattern at one of Creative Snugglies Designs Shops!


Lamb Amigurumi Free Crochet Pattern By Creative Snugglies Designs
Lamb Amigurumi Pattern Information
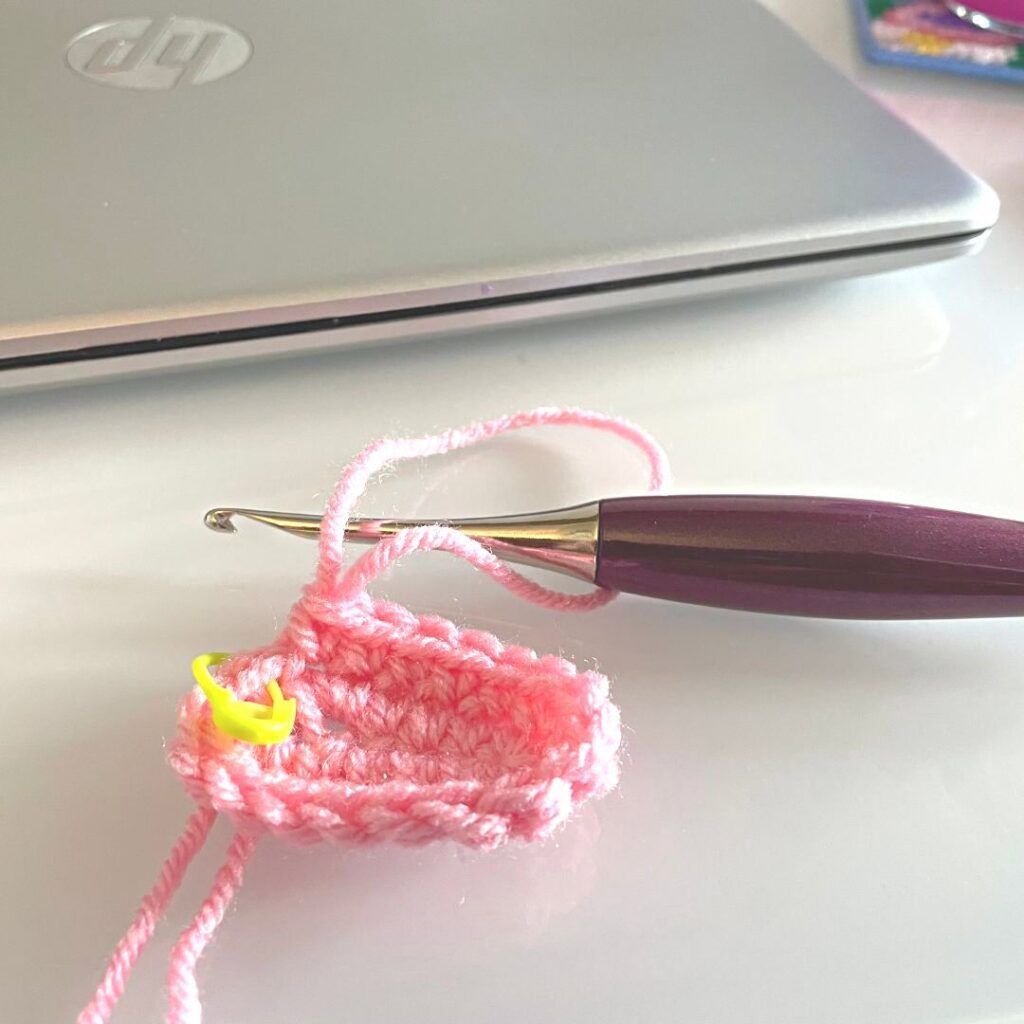
This is a very easy pattern to follow with step-by-step directions as well as lots of photo tutorials written throughout the PDF upgrade of the pattern. This pattern is a perfect crochet project for beginners.
The parts of this amigurumi pattern are worked in rounds as well as oval shapes made using continuous rounds, which means you are not joining at the end of the rounds. I use stitch markers to know where each round begins.
Special note: If you are giving this adorable lamb to a child under 3, please embroider the eyes instead of using safety eyes for safety reasons.
I chose to use *Brava Worsted weight yarn in white and cotton candy. I chose these colors because when I think of a baby lamb, I think of those colors. Of course you can use any colors you may like.
A special thank you to *WeCrochet for providing the yarn for this project and sponsoring the the Guest Designer Series!
Lamb Amigurumi
Materials
- Approx. 215 yards, Worsted Size 4, *Brava 100 grams, 218 yards in White
- Approx. 100 yards, Worsted Size 4, *Brava 100 grams, 218 yards in Cotton Candy
- Hook: G/6 4.0 mm
- *Polyfil Stuffing
- *Yarn needle
- *Stitch markers
- *Scissors
- *Safety eyes (optional)
Difficulty
Easy/Beginner
Gauge
14 sts x 17 rows SC
Size
14” x 10.5” x 3” approximately
Stitch Abbreviations
- SC – Single Crochet
- Sc2tog – Single Crochet Decrease
- Sl st – Slip Stitch
- FO – Finish Off
- St/Sts – Stitch/Stitches
- Ch – Chain
- Rnd(s) – Round(s)
- MC – Magic Circle
- Color A – White
- Color B – Cotton Candy
Pattern Notes
- US Terminology
- Read the entire pattern first.
- All parts are done in continuous rounds. DO NOT join while making the parts. Use stitch markers to know where your first stitch in the round is.
- Sl st does not count as a stitch throughout the pattern.
- Repeat stitches between * and *.
- Alternative to MC – Ch 2; work number of SC specified in the 2nd chain from the hook.

Lamb Amigurumi
The Pattern
HEAD
Rnd 1: Using Color A, create MC; 6 SC in MC. (6 sts)
Rnd 2: 2 SC in each st around. (12 sts)
Rnd 3: *SC in the next st; 2 SC in the next st.* Repeat around. (18 sts)
Rnd 4: *SC in each of the next 2 sts; 2 SC in the next st.* Repeat around. (24 sts)
Rnd 5: *SC in each of the next 3 sts; 2 SC in the next st.* Repeat around. (30 sts)
Rnd 6: *SC in each of the next 4 sts; 2 SC in the next st.* Repeat around. (36 sts)
Rnds 7-12: SC in each st around. (36 sts) (6 total rounds)
****INSERT SAFETY EYES BETWEEN ROUNDS 7 & 8 WITH 4 STS BETWEEN EACH EYE.***
Rnd 13: *SC in each of the next 4 sts; sc2tog.* Repeat around. (30 sts)
****START STUFFING HEAD.****
Rnd 14: *SC in each of the next 3 sts; sc2tog.* Repeat around. (24 sts)
Rnd 15: *SC in each of the next 2 sts; sc2tog.* Repeat around. (18 sts)
****CONTINUE STUFFING.****
Rnd 16: *SC in the next st; sc2tog.* Repeat around. (12 sts)
Rnd 17: Sc2tog around. (6 sts)
Sl st to the next st to FO with a 4” tail. Weave tail in and out of the front loops of the last round to close the hole. Hide the tail.
BODY
Rnd 1: Using Color A, create MC; 6 SC in MC. (6 sts)
Rnd 2: 2 SC in each st around. (12 sts)
Rnd 3: *SC in the next st; 2 SC in the next st.* Repeat around. (18 sts)
Rnd 4: *SC in each of the next 2 sts; 2 SC in the next st.* Repeat around. (24 sts)
Rnd 5: *SC in each of the next 3 sts; 2 SC in the next st.* Repeat around. (30 sts)
Rnd 6: *SC in each of the next 4 sts; 2 SC in the next st.* Repeat around. (36 sts)
Rnd 7: *SC in each of the next 5 sts; 2 SC in the next st.* Repeat around. (42 sts)
Rnd 8: *SC in each of the next 6 sts; 2 SC in the next st.* Repeat around. (48 sts)
Rnds 9-12: SC in each st around. (48 sts) (4 total rounds)
Rnd 13: *SC in each of the next 6 sts; sc2tog.* Repeat around. (42 sts)
****START STUFFING.****
Rnd 14: *SC in each of the next 5 sts; sc2tog.* Repeat around. (36 sts)
Rnds 15-18: SC in each st around. (36 sts) (4 total rounds)
****CONTINUE STUFFING.****
Rnd 19: *SC in each of the next 4 sts; sc2tog.* Repeat around. (30 sts)
Rnd 20: *SC in each of the next 3 sts; sc2tog.* Repeat around. (24 sts)
Rnds 21-24: SC in each st around. (24 sts) (4 total rounds)
****CONTINUE STUFFING.****
Rnd 25: *SC in each of the next 2 sts; sc2tog.* Repeat around. (18 sts)
Rnd 26: *SC in the next st; sc2tog.* Repeat around. (12 sts)
Rnds 27-28: SC in each st around. (12 sts) (2 total rounds)
Sl st to the next st to FO with a 6” tail for sewing. Finish stuffing.
ARMS & LEGS – Make 4
Rnd 1: Using Color B, create MC; 6 SC in MC. (6 sts)
Rnd 2: 2 SC in each st around. (12 sts)
Rnd 3: *SC in the next st; 2 SC in the next st.* Repeat around. (18 sts)
Rnd 4: *SC in each of the next 2 sts; 2 SC in the next st.* Repeat around. (24 sts)
Rnd 5: SC in each st around switching to Color A in the last st. (24 sts)
Rnds 6-8: SC in each st around. (24 sts) (3 total rounds)
****START STUFFING.****
Rnd 9: *SC in each of the next 2 sts; sc2tog* Repeat around. (18 sts)
Rnd 10: *SC in the next st; sc2tog.* Repeat around. (12 sts)
Rnds 11-20: SC in each st around. (12 sts) (10 total rounds)
Sl st to the next st to FO with a 6” tail. Finish stuffing. Using tail and yarn needle, fold the ends and sew them closed.
NOSE
Rnd 1: Using Color B, Ch 4; 2 SC in the 2nd chain from the hook; SC in the next ch; 4 SC in the last chain; turn to work in other side of ch; SC in the next ch; 2 SC in the last ch. (10 sts)
Rnd 2: 2 SC in the next st; SC in the next 4 sts; 2 SC in the next st; SC in the next 4 sts. (12 sts)
Rnd 3-4: SC in each st around. (12 sts) (2 total rounds)
Sl st to the next st to FO with a 6” tail for sewing. Lightly stuff.
EARS – Make 2
Rnd 1: Using Color B ch 6; 2 SC in the 2nd chain from the hook; SC in each of the next 3 chains; 4 SC in the last ch; turn to work in the other side of ch; SC in each of the next 3 chains; 2 SC in the last ch. (14 sts)
Rnd 2: SC in each st around changing to Color A in the last st. (14 sts)
Rnd 3: 2 SC in each of the next 2 sts; SC in each of the next 4 sts; 2 SC in each of the next 2 sts; SC in each of the next 6 sts. (18 sts)
Rnd 4: SC in each st around. (18 sts)
Sl st to the next st; FO with a 6” tail for sewing.
PATCH
Rnd 1: Using Color B, ch 6; 2 SC in the 2nd ch from the hook; SC in each of the next 3 chains; 4 SC in the last ch; turning to work in the other side of the chain; SC in each of the next 3 chains; 2 SC in the last ch. (14 sts)
Rnd 2: 2 SC in each of the next 2 sts; SC in each of the next 5 sts; 2 SC in each of the next 2 sts; SC in each of the next 5 sts; 2 SC in the last st. (18 sts)
Rnd 3: 2 SC in the next 2 sts; SC in each of the next 7 sts; 2 SC in the next 2 sts; SC in each of the next 7 sts. (22 sts)
Rnd 4: SC in next st; 2 SC in each of the next 2 sts; SC in each of the next 9 sts; 2 SC in each of the next 2 sts; SC in each of next 8 sts. (26 sts)
Sl st to the next st; FO with a 6” tail for sewing.
ASSEMBLY
Attach Nose on the Head from Rnds 10-14 between the eyes.
Attach Ears on Head on either side from Rnds 8-10 approximately.
Attach Head on Body using the tail from the body.
Attach arms to the last round on the body under head on either side.
Attach legs on the body from rounds 3-8 on either side of the body.
Attach Patch to the body from rounds 11-20.
Congrats you have made a lovely lamb amigurumi. Weave in all ends and you are done!
All Set!!!
I had a lot of fun designing this sweet little lamb! I hope you enjoy this pattern as well.
Prefer printed copies better?! The ad-free printable premium PDF version with stitch tutorial is available on Creative Snugglies Etsy or Ravelry!
I would LOVE to see your creations so please share your finished work! I have included links to my social media and store pages. When you share your creations, please hashtag with #CreativeSnuggliesDesigns or #CreativeSnugglies and tag me so I can find your work! Please do not hesitate to contact me with any questions at [email protected] and I will help you with the pattern.
Original Design by Christina Ryan
I hope you enjoyed making the adorable Lamb Amigurumi!
A very special thank you to Christina Ryan for sharing her pattern with us! Let’s share some love by checking out her pages and socials!
If you have nay questions about the pattern please contact Christina directly: [email protected]
Check some more free crochet patterns while you’re here!
Thanks for stopping by!

Thank you for choosing Creative Snugglies Designs. You are welcome to use this pattern to create and sell items created by you. If you sell your items online, please include a link back to my shop. This pattern and the photographs, that I provided for your convenience, are my intellectual property. They are protected by copyright and may not be used in any form. You may not share, copy, reproduce, sell, or alter this pattern and claim it as your own.
©2022 Through The Loop Yarn Craft – Ashley Edmonds This pattern and its associated images are copyright protected. The pattern is for your personal use only. Please do not copy/paste, distribute, or alter and claim as your own.
*Indicates an affiliate link which means I may receive commissions if you choose to purchase through links I provide (at no extra cost to you). Thank you for supporting the work I put into this site!. Read my full disclosure here.


You May Also Like
Hampton Handbag – FREE Pattern
Textured Crochet Washcloth Pattern